Connecting zones
Overview
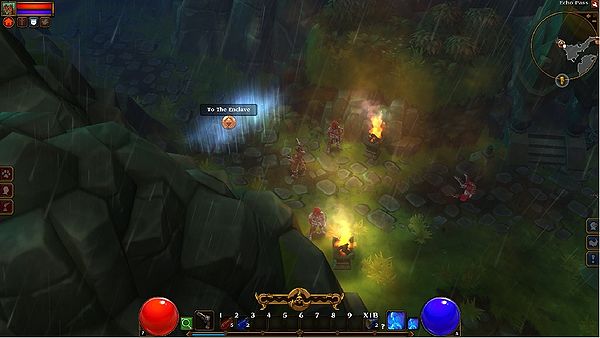
This tutorial will show you how to connect two different zones together using the outdoor areas "Echo Pass" and "The Enclave" as an example. Players start in Echo pass, and then use a portal to enter The Enclave as pictured below.
Example of portal to The Enclave
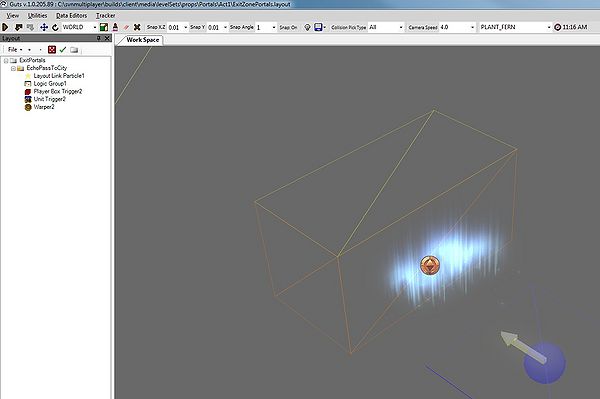
Let go over the actors needed to create this particular portal as if you were creating it from scratch. Here is what you need in your Scene Manager:
- Player Trigger Box
- Right click, Logic/Player Box Trigger
- Unit Trigger
- Right click, Units/Unit Trigger
- Warper
- Right click, Logic/Warper
- Layout Link Particle
- Right click, Building Blocks/Layout Link Particle
- Logic Group
- Right click, Logic Group
Setting the specific properties for each actor.
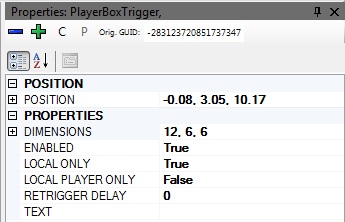
- Player Trigger Box Properties
- Picking a universal standard size for the width of the box is a good idea. Then when you place it in your level, just build around the edges with geometry to prevent the player from being able to get around it without triggering it. The important thing to set in the properties of this trigger are to make sure it's Enabled =True, and Local Only=True as shown in the picture below:
This player trigger is really a safety trigger in case the player doesn't click on the unit trigger, and tries to walk past it, the trigger box will trigger the portal on contact. You don't have to have a player trigger box if you want them to have to click to teleport. Or vice versa. Most transitional triggers have both just in case.
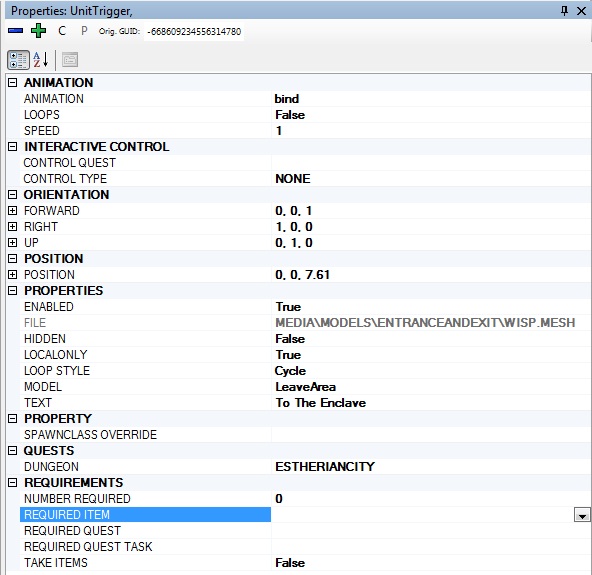
- Unit Trigger Properties
- In the unit trigger, the first thing you want to do is to set the following properties:
- "Model" type to LeaveArea
- "Loop Style" to Cycle
- "LocalOnly" to True
- "Text" to whatever the name of the area you are teleporting to. In this case, it's "The Enclave". This is what will display when the player mouses over the unit trigger in game, or has the show text on.
- "Dungeon" to whatever the name of the dungeon you are teleporting to. In this case, it's "EstherianCity". That is the name of the actual Dungeon, and "The Enclave" is the display name of that dungeon. It's best that they both have the same name, but sometimes they don't early on when final names aren't established yet. This is fine.
- Your settings should look similar to the picture below.
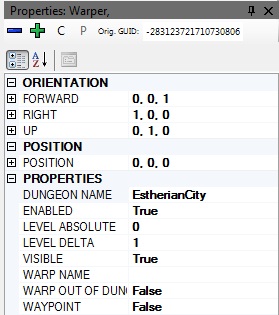
- Warper Properties
- Really all you need to change here is the Dungeon Name:
- "Dungeon Name" Change this to the name of the dungeon you are teleporting to. In this case, it's "EstherianCity".
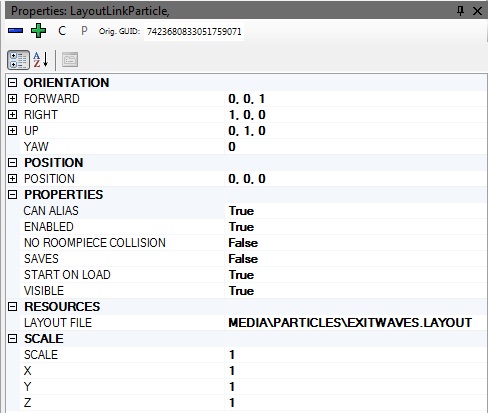
- Layout Link Particle
- All you need to change here is point the "Layout File" to the path of the particle that you want to use, and change 1 other setting.
- "Layout File" MEDIA\PARTICLES\EXITWAVES.LAYOUT is what we are using in this particular example.
- "Saves" = False
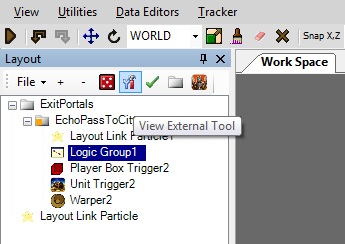
- Logic Group
- Now it's time to hook everything up in the Logic Group. Select the Logic Group actor and hit the wrench/hammer icon
 above it labeled "View External Tool" as seen in the picture below.
That will pop open your Logic Editor window. With that open, select the Player Box Trigger, Unit Trigger, and the Warper and either drag them into this window, or just select them and then in the logic window right click and select "Add Nodes Selected In Layout Scene Manager" to add all 3 of them. Now we need to add inputs and outputs to connect them. For the Player Trigger, and the Unit Trigger, click on them individually and it will display property options on the left had side. For both of those, add Outputs of "Triggered". For the Warper, add a Input of "Activate Warper". Now it should look like the picture below.
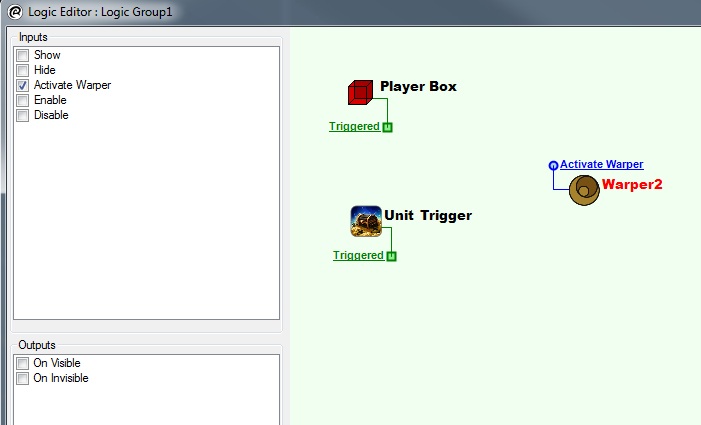
Now we need to connect these 3 actors together. From the connection points we just created, click on the out connect points of the Player Trigger Box, and Unit Trigger, and drag to the In connect point on the Warper so that it looks like the picture below.
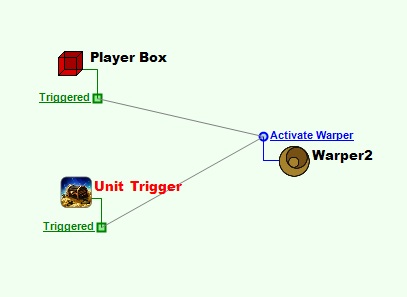
Thats it! Save this entire file somewhere, then load it into your level as a LayoutLink and it should all work. Don't forget for every zone you warp into, you will want to have a mirrored version on the other side to come back. You can just duplicate what you just made and change the Dungeon name on the warper to reflect the other dungeon.
- Useful Tips
- You want your clickable unit trigger to be just in front of the layout link particle and the player trigger box if you have one.
- The Warper actor acts as a player start when you warp from another zone into this one. That is where the player will spawn, so it's a good idea to put it out a ways away from the player box and unit trigger so that players don't accidentally click or trigger the warper and send themselves right back where they came from.