Editor Brushes
From Runic Games Wiki
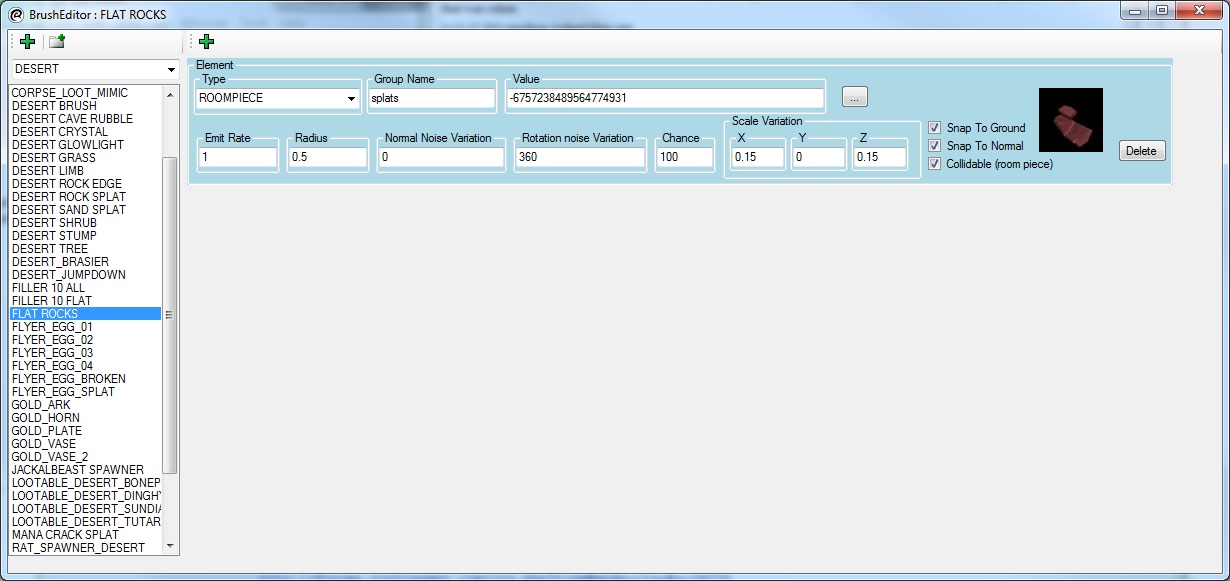
This is a sample screenshot of the editor brush window
Note: The Brush Tool will only paint on room pieces that have the "Recieves Painted Props" flag set in the Tile Set and Room Piece Editor. This is usually left unchecked for trees, bushes and other objects that wouldn't normally have items placed on top of them.
Controls
- Open the Brush Editor: Press the Paint Brush icon in the top bar or by press the "B" key with the main window selected.
- Return to Normal Operation and Close the Brush Editor: Press the "Edit Position" button in the top bar or press the "V" key.
- Place One of Each Brush Element: Middle Mouse Button over a valid surface.
- Place Elements Based on Emit Rate: Hold down Left Mouse Button.
- Erase Brush Objects: Hold ctrl and Left Mouse Button and sweep the Editor Brush Tool over the placed object.
Adding New Items
- Element: In the screenshot, there are two green "+" signs on the top bar. You can press the rightmost one to create a new Element.
- Brush: You can add a new brush by right clicking an existing brush in the list or by pressing the leftmost green "+" icon on the top bar.
- Brush Folder: You can create a new folder in which to hold brushes by pressing the New Folder Icon in the top bar.
Element Detailed
- Type: The type of object to place can either be a Room Piece, Layout Link, Layout Link Particle, or a Monster. The Value field will change depending on what type of object is selected.
- Group Name: When you place an object, it will look for a group that matches the group name and place it in that group. If the group doesn't exist, it will create a group with that name.
- Value: This is where you select which object will be placed by the Brush.
- Emit Rate: How many times per second the object will be placed per second if the use holds down the left mouse button. If the user presses the middle mouse button, Emit Rate is ignored and a single object is placed for each element.
- Radius: The radius of the Brush tool. An object can be placed randomly anywhere in the radius.
- Normal Noise Variation: Measured in degrees, this will tilt the placed object randomly within the degree tolerance. Useful for objects like rocks or other items that look better with a random tilt.
- Rotation Noise Variation: Measured in degrees, this will spin the object along the normal axis when it is placed within the degree tolerance.
- Chance: When the brush tool decides to emit an object, it will roll against this chance to see if it will really place an object. Useful when trying to stagger the placement of many elements.
- Scale Variation: Placed objects will scale +/- the value in the fields. In the above picture of the brush editor, the Y value is set to zero because the object is relatively flat and you wouldn't want to make it taller.
- Snap To Ground: You generally want to leave this checked. Will place objects at working plane height otherwise
- Snap To Normal: Will tilt an object so that it will align with the normal of what you're placing the item on. This is good for placing flat things on sloped objects.
- Collidable: Sets the collision on room pieces to false if not checked.