Quests
From Runic Games Wiki
In this tutorial we'll create a quest that asks players to kill a monster and retrieve the item it drops.
Making a Quest
- Open TorchED.
- Under the Data Editors menu, select Quests.
- Click the green plus button in the upper left to make a new quest.
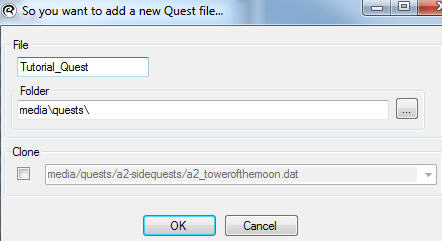
- Give your quest a name. This will be the name of the file, not what is displayed to players. Avoid using spaces. You should also make a new folder to store your quests in. You can select an existing quest to clone to give you a head start, but for this tutorial we'll be starting from scratch.
- With your new quest selected, look at the properties pane on the lower right.
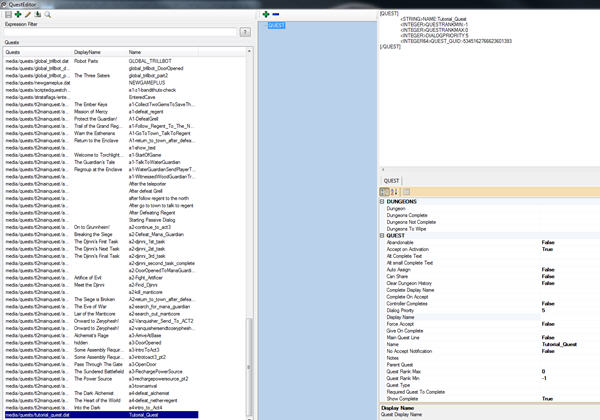
- Find the Display Name property and enter the name you want to have displayed to players.
- Set the Quest Rank Min and Quest Rank Max properties to the minimum and maximum level ranges for your quest. This is used for scaling quest rewards.
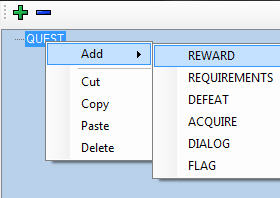
- Right click on the QUEST box in the middle column, and choose Add -> REWARD.
- In the reward properties, you can add whatever reward values you want, and they will be scaled based on the level of the quest. These values should be around 1000, to match the rest of the quests in the game. Raise or lower the numbers if your quest is easier and more difficult than others. You can also specify a Treasure Class from which an item reward can be pulled. You can make your own, or use QUESTREWARD_SIDEQUEST.
- Right click on the QUEST box again, and this time add DIALOG.
- The DIALOG box doesn't have any properties. Right click on it to add an INTRO.
- In the INTRO properties, set UnitName to the NPC you want to give the quest. You may want to make a new NPC in the monster unit editor.
- Click on the Intro property and then click the "..."
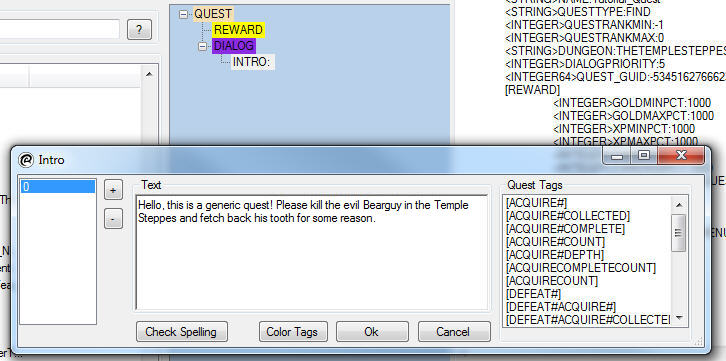
- Click the + button to add a new line of dialog. Click on the 0 to the left to select it. You may add more than one dialog to the intro. If you do, they will be randomly selected.
- With the 0 selected on the left, type in your quest dialog.
- Here is an example:
- Hello, this is a generic quest! Please kill the evil Bearguy in the Temple Steppes and fetch back his tooth for some reason.
- You'll need to follow the same basic process for Return, Complete, and Details. Return is the text which is displayed when you return to the quest-giver after accepting the quest but before completing it. Complete is shown after you've finished the quest. Details text is shown in your quest log. HUD DETAILS are what show up on the right side of the screen during play. Look at existing quests for examples of how this should work. The UnitName field should be set to the same NPC, though you could use a different unit for the complete dialog if you want a different character to end the quest.
- Now that the dialog is all set, we just need to tell the quest what monster must be defeated. Right click on the QUEST box and add a DEFEAT.
- DEFEAT doesn't have any properties, right click on it and add a UNIT. Click the + to expand UNIT.
- Set Create to true, Last Floor to false, and setSpecific Floor to 0. (0 is the first floor.)
- Set Dungeon to the name of the dungeon you want the monster to appear in. If you were hand-placing the monster, then you would leave this field blank.
- Set Champion to True, and set Min Count and Max Count to 1. Now the quest will spawn 1 monster appropriate to the tileset and make him a champion. Note that if you spawned more monsters here, the player would have to defeat them all to finish the quest.
- Now, right click on the UNIT you just made and add an ACQUIRE. Right click on the ACQUIRE, and add another UNIT. This is the item that the monster will drop.
- In the Item field, select the item you want players to retrieve. You will probably want to go into the unit editor and make a special item for your quest. Set Min Count and Max Count to 1.
- With that, your quest is complete. Hit save in the upper left.
Quest NPCs
- Now we need to make an NPC to who will give the quest. In the main editor, go to Data Editors -> Units.
- In the Group dropdown select MONSTERS, and under Filter select NPC
- Click on a1-ElderValin in the list to select him, and then click the green + in the upper left.

- Name your file, avoiding spaces, and check the box next to Clone. We're copying an existing NPC to make this easier.
- Select your new NPC from the list on the left, then give him a new Display Name.
- Click on the Modify button under the Quests box on the right.
- Find your new quest in the list on the right and select it, then it the Add button.
- Save your new Unit.
- The last step is to add the new character to town. You can just open up the town layout in the editor, add a new monster, and set the monster to be the NPC you just made.
You can follow similar steps to make a special monster for your quest, and to create a special item for players to retrieve.