Tile Set and Room Piece Editor
Tile Sets and Room Piece Editor
1. Getting started
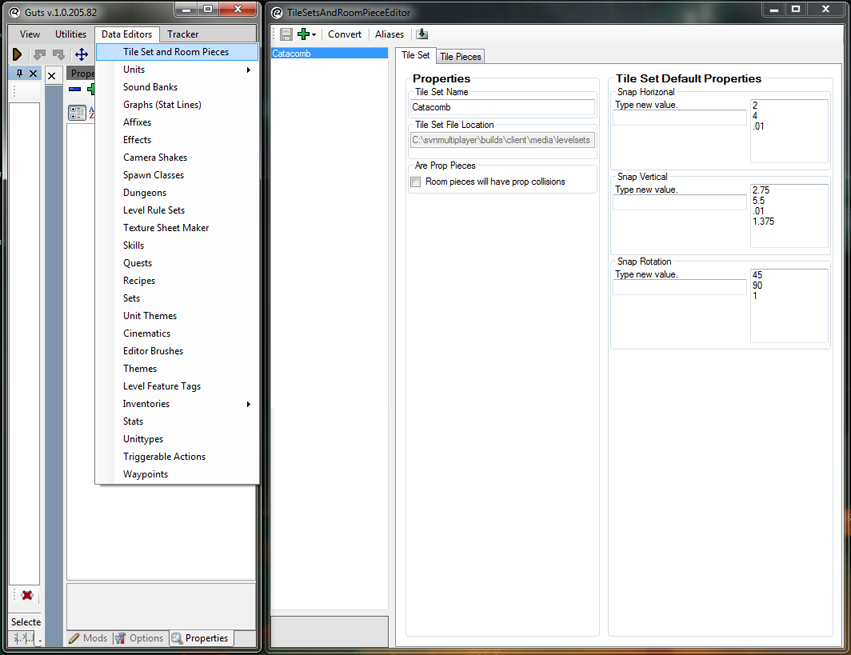
Within the Tile Sets and Room Piece Editor you will be able to create a tile set with rules, add meshes exported from your 3D modelling program of choice to that tile set as a room piece, and define various properties of that room piece. This is essentially the first step in getting your exported room piece meshes into the game. Here is what the window looks like:
2. Creating a tile set
Once you have the Tile Sets and Room Piece Editor open, click on the green arrow at the top left corner of the window and select 'New'. This will create a new tile set in the left column of the window. Once you've created a new tile set you can name it whatever you want in the 'Tile Set Name' field under 'Properties' within the 'Tile Set' tab.
To the right of the 'Properties' column, you will see the 'Tile Set Default Properties'. This is where you will set the tile set's snap values. To add a snap value, you simply type in any number to any of the three fields (Horizontal, Vertical, and Rotation) and press enter. You can add as many snap values as you would like. For 'Snap Horizontal' and 'Snap Vertical', this number indicates how many units you can move the room pieces once placed inside the editor with snap turned on. For 'Snap Rotation', this number indicates how many degrees you will be able to rotate the room pieces in the editor with snap turned on. These snap values should be calculated in whatever 3D modeling program you've used to create the assets you are adding to the tile set.
3. Adding a mesh to the tile set
Once you've finished naming your tile set and setting it's snap values, it's time to start adding room pieces. Click on the 'Tile Pieces' tab in the middle column of the window and you will see this:

In this example, the name of my tile set is 'Catacomb' and as you can see there are many room pieces already added in the middle column. I've selected 'bridge_middle_01' as an example piece. At this point the middle column of the window under the 'Tile Pieces' tab will be empty in your window. To add a new room piece to your tile set, click on the 'New' button at the bottom of the middle column. This will create a new room piece in the middle column. On the right column, under the 'Files' tab, you will see two large fields. One is labeled 'Mesh Files' and the other is labeled 'Collision Files'. Click on the 'Add File' button under 'Mesh Files' and locate the room piece mesh you've exported from your 3D program. Once you've navigated to the mesh file and selected it, you will see that it will be added to the 'Mesh Files' field. You can add more than one mesh this way per room piece. When more than one is added, the piece will randomize between them when placed in the editor. If this piece has a collision mesh associated with it that you've created and exported from your 3D program, you will need to click the 'Add File' button under the 'Collision Files' field and navigate to the mesh the same way you did for the room piece. At this point you can rename the tile piece to whatever you want in the supplied field at the top of the right column.
4. Setting the room piece's properties
The middle tab you will see in the far right column is labeled 'Snap'. If you had previously designated snap values in the previous step while creating the tile set, these values will be automatically filled in for you. If there are certain room pieces you would like to remove or add snap values to, here is where you would do so.
The far right tab you will see in the right column of the window is called 'Properties'. Here is what it looks like:
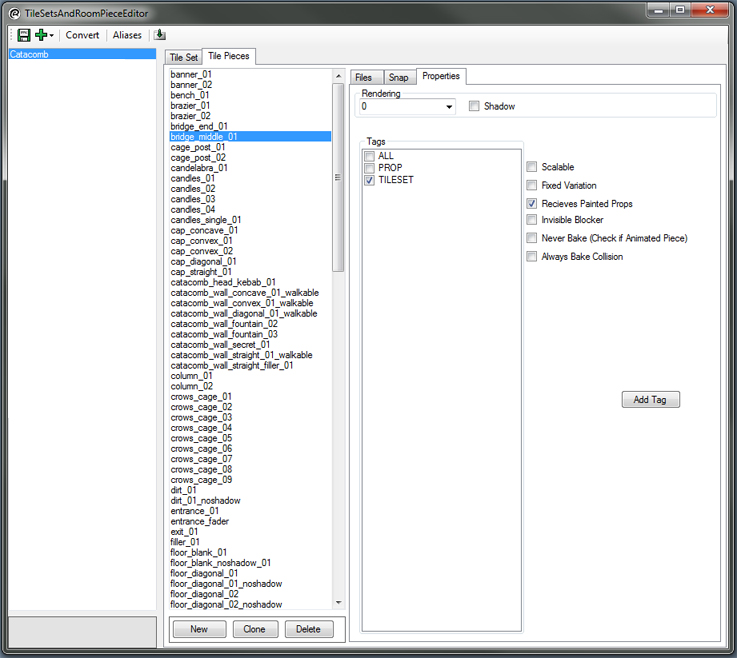
Here you will be able to set a few properties for your room piece. The 'Rendering' drop down denotes at what level your item draws on top of other items. For instance; if you had an alpha plane of grass or some other foliage, and you wanted it to "draw" on top of another alpha plane of a patch of dirt, you would want to set the dirt's render order to 0, and the foliage's render order to 1.
The 'Shadow' check-box to the right of the 'Rendering' drop-down determines whether or not the object will cast shadows from the center "player light". Most objects you make you want to leave this unchecked.
The 'Tags' field is where you can specify whether the room piece will show up as a prop, tile set piece, or all when filtering by piece type in the room piece palette. There is an 'Add Tag' button near the bottom right of this window that will add other tags if you would like to further specify what category the room piece can be filtered by in the room piece palette.
The 'Scalable' check-box to the right of the 'Tags' determines whether or not the room piece will be able to be scaled once placed in the editor.
The 'Fixed Variation' check-box determines whether or not the piece will randomize with the other meshes you've selected in the 'Mesh Files' field you added to earlier. With the box ticked, it will remain the mesh that was placed the first time even when the world re-rolls.
The 'Receives Painted Props' determines whether or not you can use the paint props tool on the piece once in the editor. For instance, if it was a floor piece and you wanted to be able to "paint" grass planes onto it, you would want this box to be ticked.
The 'Invisible Blocker' check-box determines whether or not the piece is to be used as an invisible collision blocker piece that can only be seen in the editor.
The 'Never Bake' check-box determines whither or not the collision of a piece bakes or not. When it's not baked, collision for something like a door is able to move when the door is opened. Always check this box if it's an animated piece.
The 'Always Bake Collision' check-box determines whether or not the piece's collision always bakes or not. When collision is baked, it is unable to move.
Once you've completed these steps with all of the meshes of your tile set, you are ready to open up the 'Room Piece Palette' and start building a level!