Moving Objects with a Timeline
Contents |
Overview
This tutorial will cover the basics of how to move objects with a Timeline when the Player enters a specific area for the first time. It will assume you already have a fundamental understanding of how to navigate and use the GUTS editor along with being familiar with Basic Scripting.
Step-by-Step
Initial Set Up
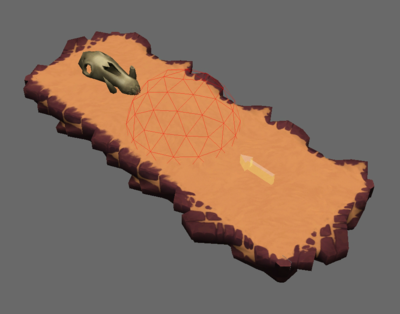
- Create/Load a level with a pathable area for the Player to walk.
- Turn Show Helpers on ( Ctrl + H ) to make the logic objects that will be created visible in the editor.
Add Necessary Objects
Right-click on an empty space in the Layout Scene Manager and add the following objects:
- Group
- Building Blocks > Room Piece
- Logic Group
- Logic > Player Sphere Trigger
- Logic > Timeline
Add Object to Group
- Move the Room Piece Object under the Group Object in the Layout Scene Manager.
Move Objects
- Move the Player Sphere Trigger to a pathable area where the Player should trigger the Timeline to play.
Change Properties
Select the Room Piece and change the following properties in the Properties Window:
- "Bake" to False
- This sets the Room Piece to not bake and be destroyed when the level so it can be moved dynamically.
Select the Timeline and change the following properties in the Properties Window:
- "Start on Load" to False.
- This sets the Timeline to only play when it receives a "Play" Input event instead of automatically on level load.
- "Duration" to 2.
- This determines the duration of the Timeline from start to finish.
Select the Player Sphere Trigger and change the following properties in the Properties Window:
- "Radius" to 4.
- This sets the size of the Player Sphere Trigger. The Player must enter this sphere to trigger it.
Edit Timeline
Add Objects to Timeline
Select the Timeline, open the Timeline Editor, and add the Group to the Timeline Editor window.
- Right-click on the Group and select "Position" from the menu.
- This is the property that will be modified by the Timeline.
Set Up Timeline
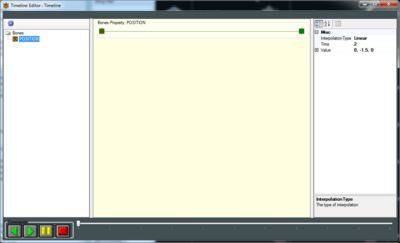
- Right-click on the "Position" timeline in the middle of the Timeline Editor window and select "Add New Point".
- This adds a new keyframe to the timeline where properties of the object's "Position" can be modified.
- Select the Point and change the "Time" property to 0.
- This moves the Point to the start of the timeline.
- Right-click on the "Position" timeline in the middle of the Timeline Editor window and select "Add New Point".
- This adds a new keyframe to the timeline where properties of the object's "Position" can be modified.
- Select the Point and change the "Time" property to 2.
- This moves the Point to the end of the timeline.
Change Properties
- Select the second Point and change the "Y" value to -1.5.
- This will move the Group, and all child objects under it, down 1.5 units.
Edit Logic Group
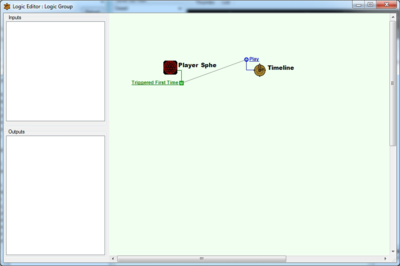
Select the Logic Group, open the Logic Editor, and add the Player Sphere Trigger and Timeline objects to the Logic Editor window.
- Specify the "Triggered First Time" Output on the Player Sphere Trigger.
- This Output event is only fired once when the Player enters the Player Sphere Trigger for the first time.
- Specify the "Play" Input on the Timeline.
- This will play the Timeline forward.
Link the "Triggered First Time" Output and "Play" Input.
Conclusion
When the Player enters the Player Sphere Trigger for the first time the Timeline will play and move the object down to the specified position. The Timeline will not play again if the Player re-enters the Player Sphere Trigger.
Example
Download an example layout of the tutorial here: